The Library provides Partners with self-service access to marketing resources, sales tools, technical documentation, and more. This article explains how to upload and categorize content using Folders, Tags, and Custom Fields. It also provides an overview of the available layout configuration options for the Library. 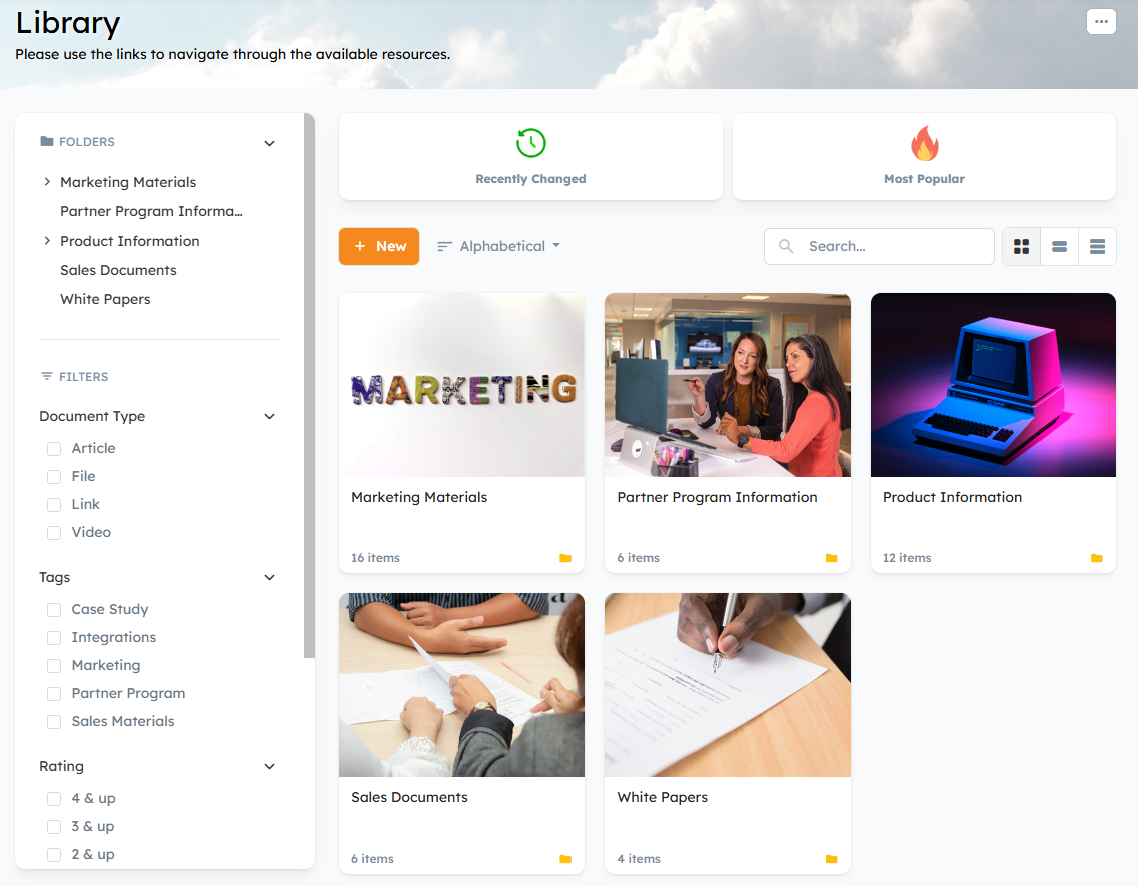
Note: Your Library can be configured in two modes: Folder Mode and Flat Mode. However, Flat Mode does not support Folders. To learn more about these options and which mode to choose for your channel partner Library, please refer to the Library Settings article.
Adding Folders:
The Folder Mode layout configuration option allows you to use Folders to organize and catalog files, links, articles and videos uploaded to the Library. It's important to create a Folder structure that Partners will understand. Having an intuitive Library structure makes your Partners keep coming back to the portal to access the materials they need to sell your products and services.
When creating your Folder structure, we recommend reviewing the Partner content that you have and grouping the content by type, product, solution, or category. For more tips and best practices, check out: What's the Best Way to Structure my Partner Library?.
To add a Folder:
- Go to the Library and click the "New" button > New Folder.

- Name your Folder.
- Add a description.
- The "Folder Location" dropdown menu allows you to specify where in the Library you want the Folder to appear.
- You can use the default thumbnail image for the Folder or click the “Upload File” button to upload a custom image for the Folder's thumbnail. The image should be saved as GIF, PNG, JPG, JPEG, or JFIF and be at least 180px in both dimensions.
- Click "Save" to save your changes.

Adding Content:
To add content:
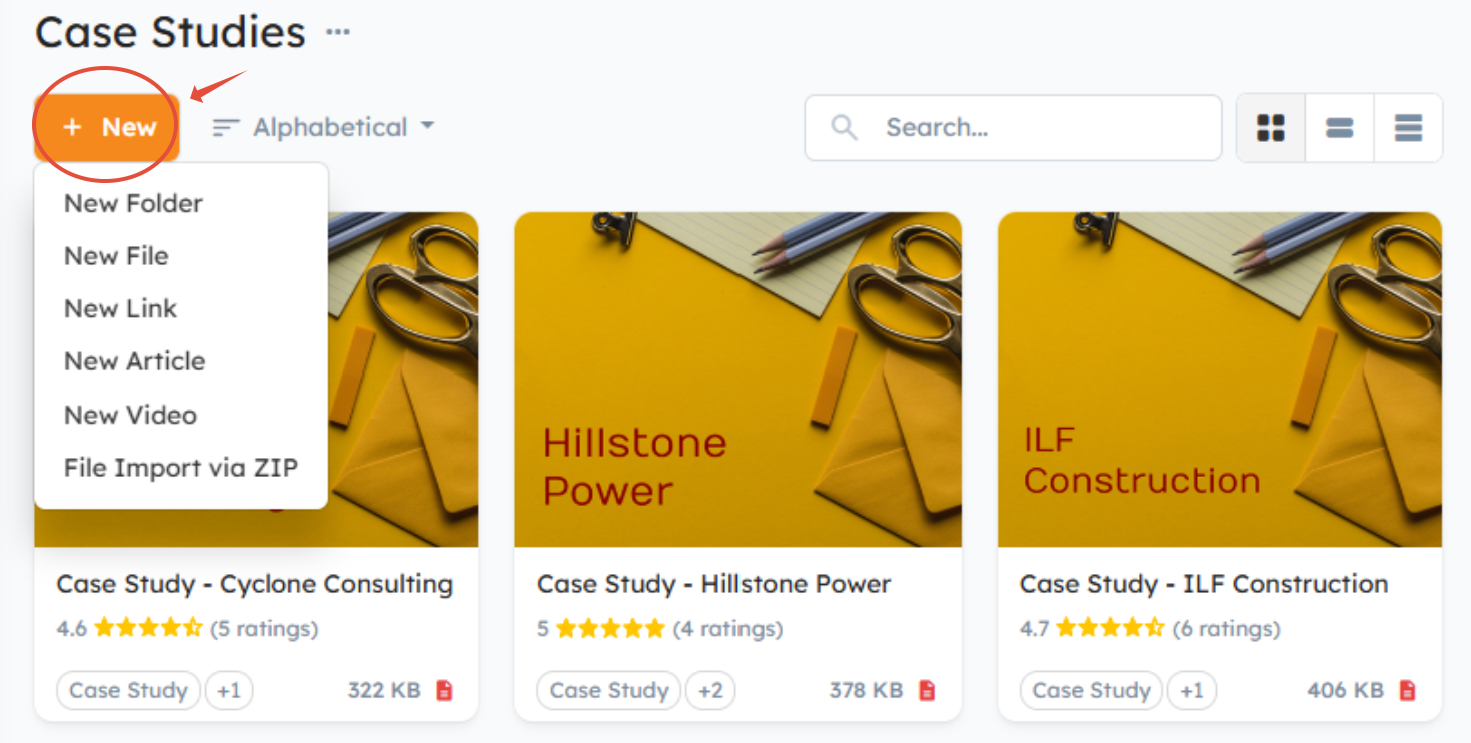
- Click the "New" button on the Library's home page or click on the Folder that you want to add content to > New.
- Select the content type you would like to add:
- New Folder (subfolder)
- New File
- New Link
- New Article
- New Video
- File Import via ZIP
3. Upload your file.
4. Give the file the title you want Partners to see within the portal.
5. Use the “Folder Location” dropdown menu to specify where in the Library you want the item to appear.
6. Use Tags to add keywords, labels, or metadata to your Library content. Users can filter Library content using Tags to help them find the content they're looking for. Tags are optional, and there's no limit to the number of Tags that can be defined. 
7. Select a system-generated thumbnail image for the File's thumbnail or upload a custom image by clicking the “Upload File” button. The thumbnail image will appear in the Library's Wide and Large Tile views.
8. Add any Keywords you want associated with the file.
9. Specify which Users will have access to the File using the below Permissions and Visibility Options:
- Everyone: All Users assigned to Groups with "Library Access" will have access to the file.
Selected Groups: Only Users in the selected Groups will have access to the file. (Gives you the ability to select the Groups that you want to have access to the file.)
Smart Permissions: Only Users who match the rules that you specify will have access to the file.
No One (hide this file from regular Users): The file will only be visible to Admin Users and Internal Users with "Document Administration" access to the Library.
TIP: You can assign files to a specific Organization so that only Users from that Organization see the files in the Library, using the "Organization" dropdown menu along with the "No One" access option.
Note: For more information on the Permissions and Visibility options listed above, check out: How do I set Partner Portal Content Access & Permissions?.
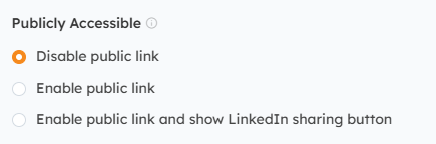
Publicly Accessible (optional): You can also choose to make the content publicly accessible, which enables a special link that Admins can use externally for non-portal Users to download files. Additionally, you can enable the LinkedIn sharing option to give Users the ability to share the file on their LinkedIn right from the portal. Please note that Channeltivity does not track downloads using the public link.
Viewable From & Until Dates (optional): Choose when the content becomes visible to Users and, if needed, when it should automatically expire and be removed from view.

Uploading Videos
You can upload videos to the Library by clicking the "New" button and selecting one of the following options: 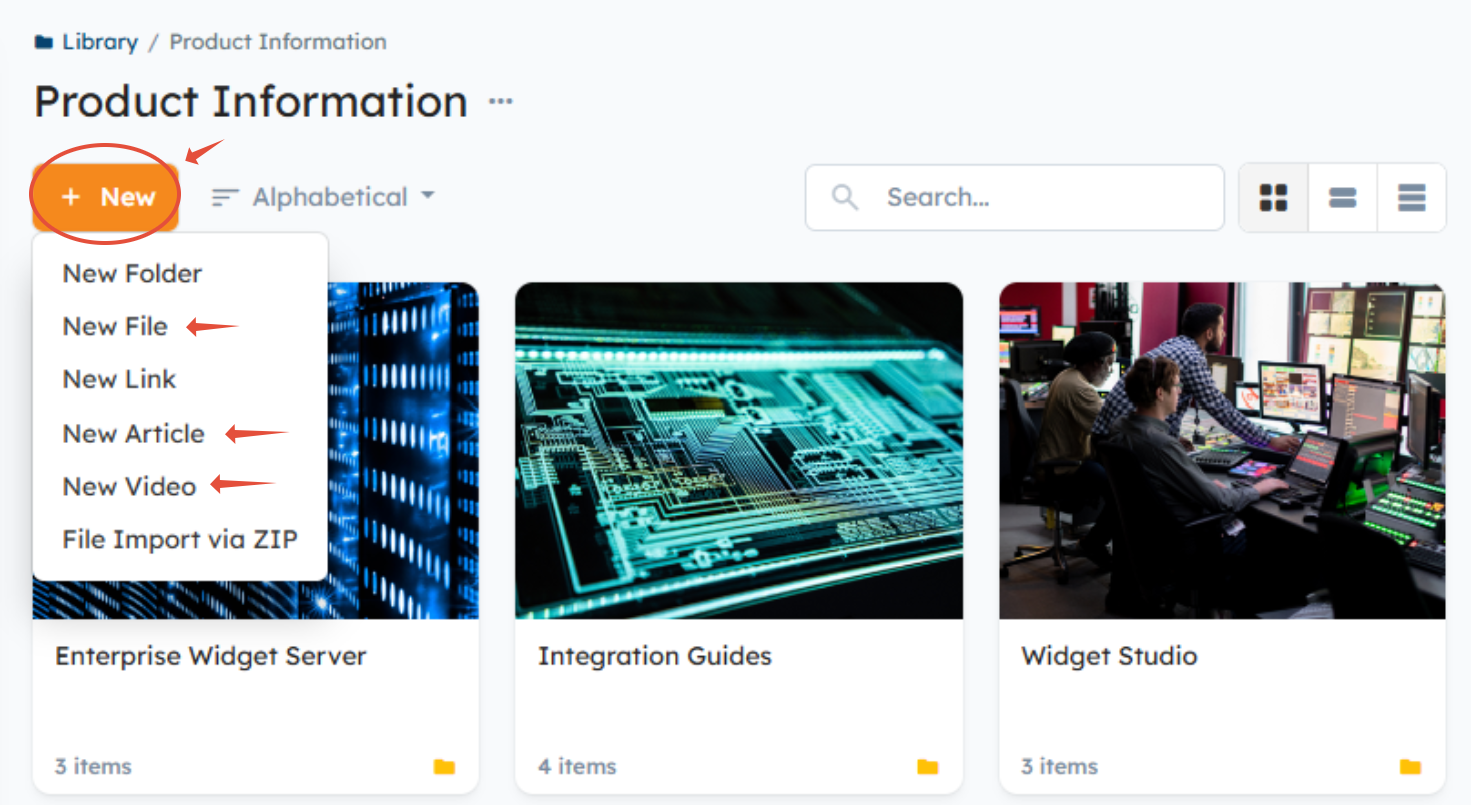
- New File and File Import via ZIP: The video will not play in Channeltivity. To view it, Users must download it to their computer and use an external media player.
- New Article: The video will be displayed in the body of an Article Document.

- New Video: The video will play in Channeltivity. Video upload options include the following:
- Select the "Upload File" button to upload MP4, AVI, MOV, WMV, and MKV video files (see Note below).
- Select the "YouTube/Vimeo" button to enter the URL to a YouTube or Vimeo video

Note: You can prevent Non-Admin Users from downloading videos by toggling off the "Allow non-Admin Users to download this video" option in the screenshot below. This setting becomes available when uploading one of the following video file types: MP4, AVI, MOV, WMV, MKV.
FAQs
How Do I Assign Permissions to Folders?
Permissions are assigned to content, NOT folders. The way the Library works is that Users (assigned to Groups with Library Access) only see the folders in the Library that have content assigned to the Groups they are assigned to. For example, if a folder contains content that is only assigned to one Group, then only the Users in that Group will see the Folder in the Library. Other Users from other Groups will not see the Folder in the Library because it does not contain content that is assigned to their Group.
How Does the Organization Assignment Functionality Work?
It allows you to assign content to an Organization, and only the Users at that Organization will have access to that piece of content. 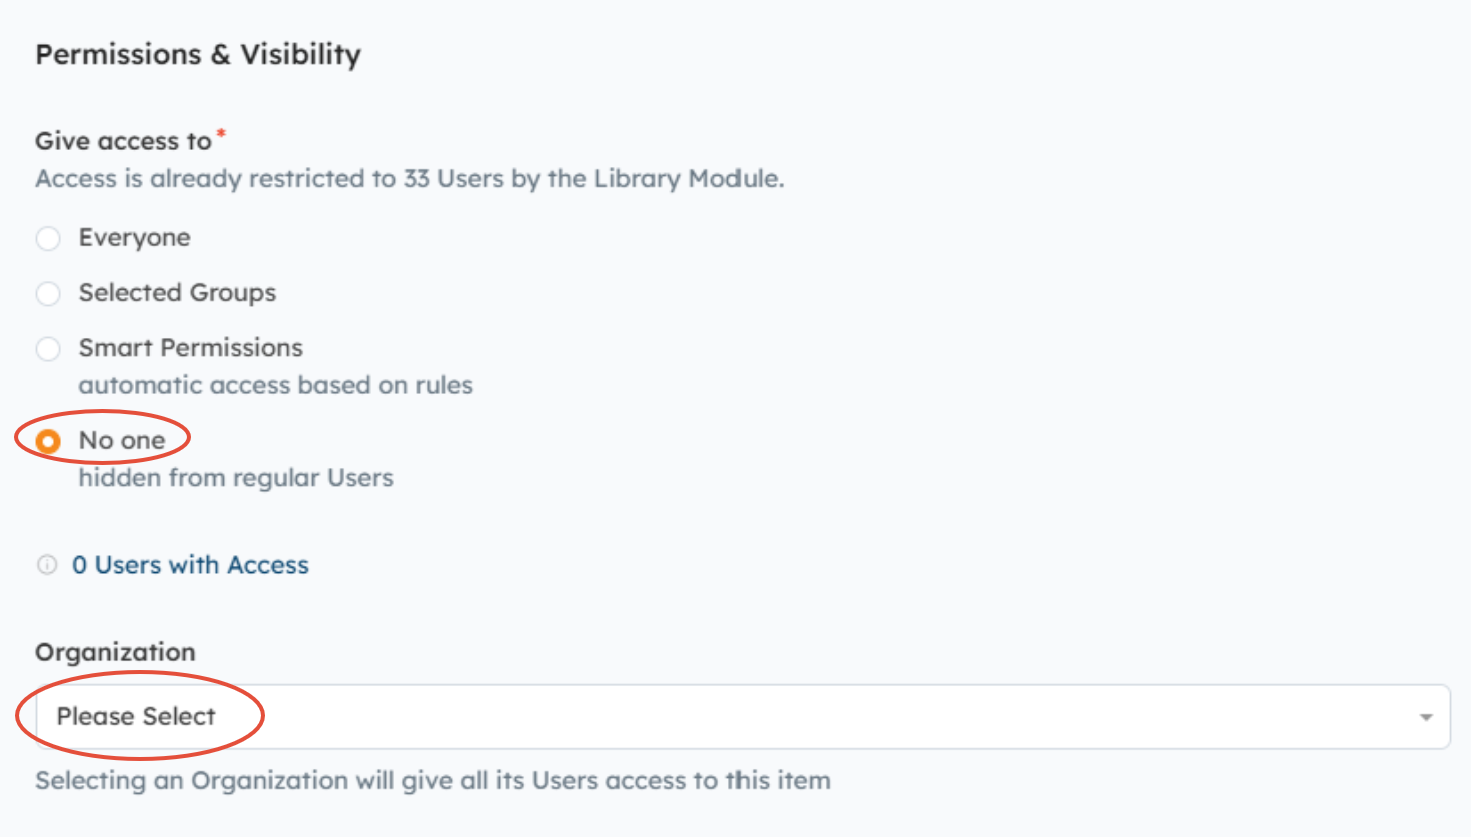
How Do I Make Content Publicly Accessible?
Library Documents can be marked as "Publicly Accessible," which creates a unique link that can be shared publicly with non-portal Users. You can also enable the LinkedIn sharing option to give Users the ability to share content to LinkedIn. Learn more about this topic here: How Do I Make a Library Document Public so that Anyone Can Download It?.
Next up:
- Setting Group Permissions for Library Content
- Library & Content
- What's the Best Way to Structure my Partner Library?
- How Do I Bulk Upload Files to the Library Using a ZIP File?
Was this article helpful?
That’s Great!
Thank you for your feedback
Sorry! We couldn't be helpful
Thank you for your feedback
Feedback sent
We appreciate your effort and will try to fix the article