To make your Library content more compelling and easier to find, you might consider setting Thumbnails for your Documents and Folders. Adding Thumbnails makes your content more visually engaging and streamlines the content navigation process, making it more efficient for Users to locate and engage with the specific materials they're seeking.
This article explains how to set and configure Thumbnail images for Documents and Folders. For more tips and best practices on how to create a visually engaging resource Library, check out this article.
Which Layouts include Thumbnail images for Documents and Folders?
The Tile and Wide Layouts include thumbnail images for Documents and Folders.
- Tile

- Wide

How do I set the Default Layout for the Library?
You can set the Default Layout for the Library as well as set the Default Thumbnail Display Setting for images associated with Documents and Folders from the Library Configuration Menu by clicking the ellipsis icon (three dots) on the right > Configure Library > Library Settings.


You'll then scroll down the right-side panel to configure the following Default Layout setting:
- Tiles
- Wide
- Compact (does not include Thumbnail images)
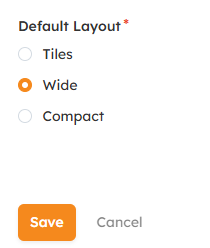
Please note that Users can change the layout in their individual library settings at any time.
How do I set a Document's Thumbnail?
When you add a Document to the Library, the Default thumbnail, which is an image that includes the file's title is automatically selected. However, for certain file types such as images and PDFs, an additional thumbnail image is automatically generated. You can choose to use one of the system-generated Thumbnail images or upload your own custom image for the Thumbnail. 
If you want to upload a custom Thumbnail image, you can do so by clicking the "Upload File" button.
- Image Requirements - The image should be saved as GIF, PNG, JPG, JPEG, or JFIF and be at least 512px in both dimensions.

How do I set a Folder's Thumbnail?
When creating a new Folder, you'll have the option to use the default Folder Thumbnail image or upload a custom image for the Folder's Thumbnail: 
If you want to upload a custom image for the Folder's Thumbnail, you can do so by clicking the "Upload File" button.
- Image Requirements - Image should be saved as GIF, PNG, JPG, JPEG, or JFIF and be at least 512px in both dimensions.
How do I update Document and Folder Thumbnails?
Documents:
Hover over the Document you'd like to edit and click the ellipsis icon in the top right corner of the Thumbnail > Edit. 
Folders:
Click on the Folder you'd like to edit to view its contents.

You'll then hover your mouse over the title of the Folder and click the ellipsis icon > Edit. 
You can also edit Folder Thumbnails from the Folder Tree Navigation in the left side panel by hovering over the Folder you'd like to edit and clicking the ellipsis icon on the right > Edit. 
Related Documentation:
- Adding Folders and Uploading Content to the Library
- Creating a Visually Engaging Partner Library, Step by Step
- Library Configuration: Library Settings
Was this article helpful?
That’s Great!
Thank you for your feedback
Sorry! We couldn't be helpful
Thank you for your feedback
Feedback sent
We appreciate your effort and will try to fix the article