This article gives step-by-step instructions of Channeltivity's Referral integration with Salesforce. An overview of the integration can be found here: Salesforce Integration: Referral - Overview.
You will need to complete the following to set up Channeltivity's Referral integration with Salesforce:
- Complete the Salesforce Integration Credentials Setup to connect Channeltivity to Salesforce.
- Create the below checkbox fields on the Lead and Opportunity objects in Salesforce. The fields will be used by Channeltivity to flag/identify the Salesforce records that are syncing with Channeltivity.
***You can skip this step if you've already configured the Deal Registration integration with Salesforce.***
- Create a checkbox field "Sync with Channeltivity" on the Lead object in Salesforce
- Create a checkbox field "Sync with Channeltivity" on the Opportunity object in Salesforce
Step 1: Enable the integration in Channeltivity
Log into Channeltivity as an Administrator and go to Settings > Salesforce Integration > Referral Integration.
Choose whether you want Channeltivity to automatically create a Lead in Salesforce whenever a Referral is submitted or whether you want the manual control over which Referrals get pushed to Salesforce. 
- Referrals pushed into Salesforce will create Leads. If you have different Lead record types defined in Salesforce, you can specify which record type to use.
- Select the new "Sync with Channeltivity" checkboxes that you created from the two dropdown menus.

Step 2: Configure Field Mappings
- Referral to Salesforce Lead
- Referral to Salesforce Opportunity
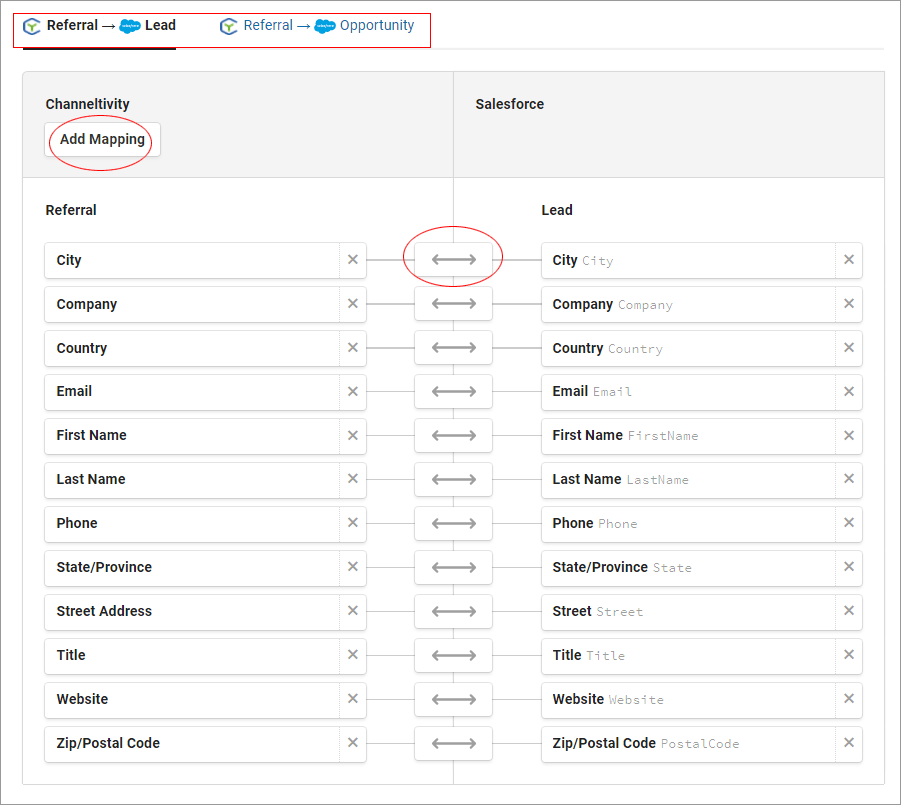
Once all your mappings are complete, press the "Save" button at the very bottom of the page to finish the setup process. Depending on the details of your Salesforce configuration and whether you're creating new fields in Salesforce as part of the process, the saving process can take up to 30 minutes. When the setup process is complete, you will be redirected to the Salesforce Integration Settings page.
Step 3: Test the Integration
You're all set! Go ahead and submit a Referral to test out the integration between your Channeltivity PRM and Salesforce.
Was this article helpful?
That’s Great!
Thank you for your feedback
Sorry! We couldn't be helpful
Thank you for your feedback
Feedback sent
We appreciate your effort and will try to fix the article